DIY : Mini Palette Coasters
Today, I have something cute to share with you guys.
I personally am obsessed with wood palettes or just anything wooden.
I came across this random DIY video in youtube and I decided to give it a go.
Its something very useful too.
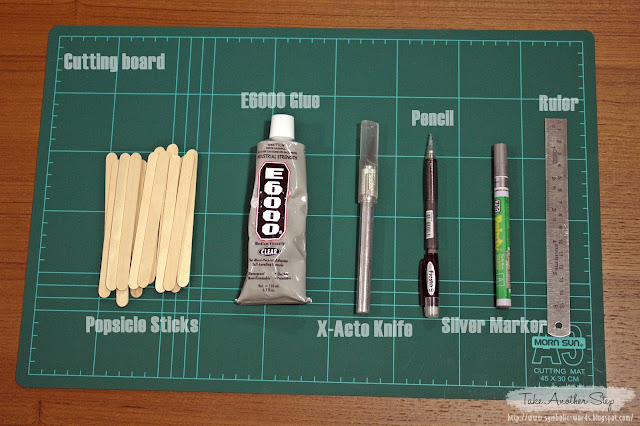
Here's what you need to get started :
Cutting Board / Pad
Popsicle Sticks
E6000 Glue
X-Acto Knife
Pencil
Silver Marker
Ruler
If you don't have the E6000 glue, hot glue gun is fine too!
First, you will need 12 popsicle sticks to make 1 mini palette.
Draw a line at both of the ends close to the rounded edge.
That would be the part you will be cutting off to get that palette effect.
It will look like this.
Then, cut off the ends with an X-Acto knife or a pair of scissors.
Scissors would be the best.
It should look like this!
Its okay if the edges are a little pointy and uneven.
You can trim it nicely with a pair of scissors if you want it to look neat.
Then, put on some glue at both ends and also the center of the popsicle stick.
Hot glue and the E6000 dries up pretty fast so make sure to be quick.
This is where the glue should be.
Once the glue is on, grab 3 popsicle sticks and stick them on vertically.
Set it aside to dry for a bit. (Picture 1)
You can then stick the another popsicle stick horizontally at the other end of the popsicle sticks that are placed vertically to keep them stable. I used the width of from the cutting board to make sure they were straight and evenly aligned.(Picture 2)
Once that is done, stick on the top part and set them aside to dry again.
(Picture 3 & 4)
Once everything is dry, stick on the remaining popsicle sticks and it should look like the picture above.
For the final touches, use a silver marker to draw 2 dots on each popsicle stick
for the nail effect like the real wood palette and you're done!
I made one with a rainbow coloured popsicle stick I got from the stationary shop.
I used a clear coat spray paint to spray on the mini palettes before using them.
This is so the colour won't fade when it comes in contact with water.
I hope my tutorial was easy to follow. Trying really hard to explain it in words.
Do leave a comment below if you need more info or if you have any other questions.
I'll be back with another DIY!


Comments
Post a Comment